How to DIY a Home Test to Detect, Capture & Measure Pet Dander
Introduction
Pet owners frequently discover that allergies, persistent odors, and reduced indoor comfort stem from airborne pet dander. This guide explains how to create a reliable home test that detects, captures, and measures pet dander using affordable tools and systematic procedures. Readers will learn how to assess the concentration of dander, identify problem areas, and implement mitigation strategies that improve air quality for both humans and animals.
The information presented is based on scientific principles of aerosol sampling and real‑time air‑quality monitoring. By following each step, one can obtain quantitative data rather than relying solely on subjective impressions. The result is a clearer understanding of how pet dander circulates within a living space and how to reduce its impact.
What You’ll Need
- Portable air‑quality monitor capable of measuring particulate matter (PM2.5) – first mention of Temtop M10+.
- Multi‑parameter monitor for CO2 and volatile organic compounds – first mention of KDWKD CO2 & TVOC Home Air Monitor.
- High‑efficiency particulate air (HEPA) purifier to capture dander – first mention of Levoit Vital 100S-P.
- Wireless CO2 sensor for ventilation assessment – first mention of Aranet4 Home.
- Adhesive dust‑capture tapes or silicone pet‑dander traps.
- Notebook or digital spreadsheet for recording data.
- Smartphone with the respective apps installed for each monitor.
All of the electronic devices listed above are available on Amazon and include detailed specifications that make them suitable for a home‑based dander test. The remaining items are inexpensive and can be sourced from local hardware stores.
Step 1 – Prepare the Testing Environment
Begin by selecting three representative rooms: a high‑traffic area where the pet spends most of its time, a secondary room with limited pet access, and a control room where no pet is present. Close windows and exterior doors for a minimum of thirty minutes to stabilize indoor air conditions. Turn off HVAC systems temporarily to avoid dilution of airborne particles during the measurement period.
Place the Temtop M10+ on a stable surface at breathing height (approximately 1.5 meters from the floor). Power on the device and allow it to calibrate for five minutes. The e‑ink display will show real‑time PM2.5 values, which serve as a proxy for pet dander concentration because dander particles typically fall within the 0.3‑2.5 µm size range.
Simultaneously, position the KDWKD CO2 & TVOC Home Air Monitor in the same room to record CO2 levels, temperature, and humidity. Elevated CO2 can indicate poor ventilation, which often correlates with higher dander accumulation. Record the initial readings in the notebook before proceeding.
Why these devices are essential: the Temtemp M10+ provides accurate particulate data with a battery life of up to sixty days, eliminating the need for frequent recharging during a multi‑room test. The KDWKD monitor adds contextual environmental data, allowing the user to differentiate between dander spikes caused by pet activity and those caused by humidity fluctuations.
Step 2 – Capture Airborne Dander Samples
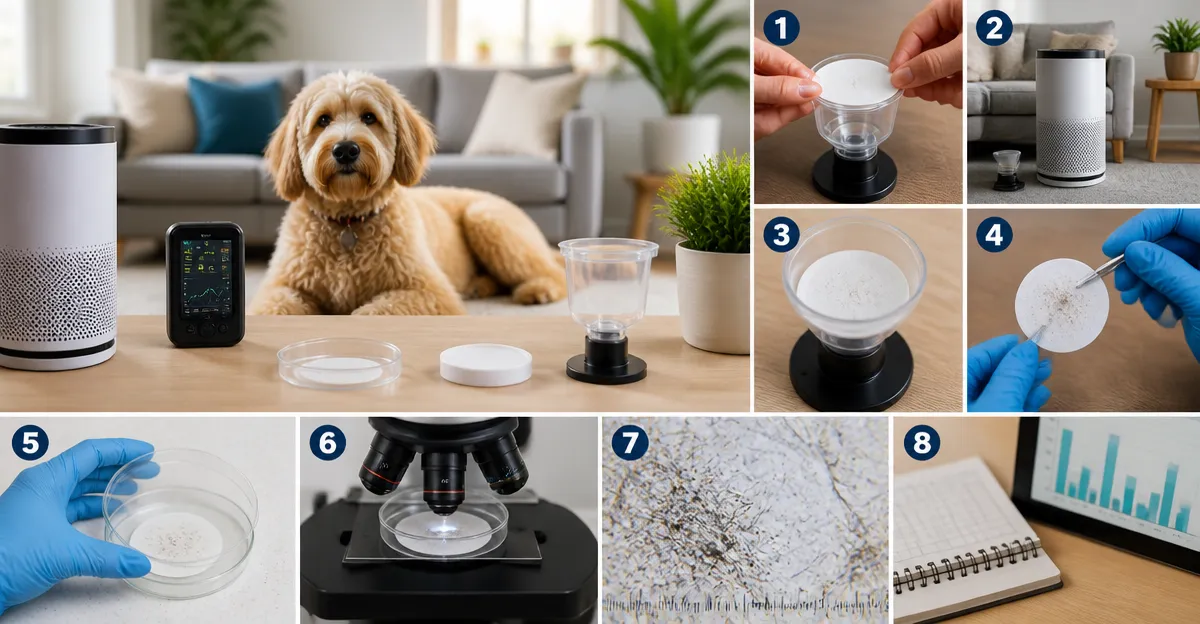
After the environment has stabilized, activate the adhesive dust‑capture tape on a flat surface located three meters from the pet’s usual resting spot. The tape should be left undisturbed for fifteen minutes to collect airborne dander that settles naturally. This passive sampling method complements the active monitoring performed by the electronic devices.
During the sampling interval, keep the Temtop M10+ running continuously. Observe any fluctuations in PM2.5 readings and note the time stamps when peaks occur. Peaks often correspond to pet movement, grooming, or shedding events. Use the device’s companion app to export the data as a CSV file for later analysis.
Once the fifteen‑minute period ends, carefully remove the tape and place it in a sealed plastic bag to prevent contamination. Label the bag with the room name and the exact start and end times of the capture. Repeat this process in each of the three selected rooms, ensuring that the same duration and distance parameters are maintained for consistency.
The combination of active electronic monitoring and passive tape capture provides a comprehensive picture of both real‑time particle concentrations and cumulative deposition, which is critical for accurate dander quantification.
Step 3 – Measure and Analyze Collected Dander
Transfer the sealed tape samples to a laboratory‑grade optical microscope or a low‑cost handheld particle counter if available. Count the number of visible dander fragments per square centimeter. For a home‑based approach, compare the visual density of the tape against a reference chart that correlates particle density with PM2.5 concentration levels reported by the Temtemp M10+.
Import the CSV file from the Temtemp M10+ into a spreadsheet program. Calculate the average PM2.5 concentration for each room and identify any outliers. Cross‑reference these values with the CO2, temperature, and humidity data recorded by the KDWKD monitor. A pattern of high PM2.5 coinciding with elevated CO2 often indicates inadequate ventilation, which exacerbates dander persistence.
If the analysis reveals that the primary room exceeds 35 µg/m³ of PM2.5—a level commonly associated with moderate indoor air pollution—consider deploying the Levoit Vital 100S-P to capture airborne dander. Position the purifier centrally and set it to the highest clean‑air delivery rate (CADR) for particles. The purifier’s HEPA filter captures 99.97 % of particles down to 0.1 µm, effectively removing the majority of pet dander from circulation.
The Aranet4 Home monitor can be used in parallel to verify that CO2 levels drop after the purifier is activated, confirming improved ventilation. Record the post‑purification readings to demonstrate the efficacy of the intervention.
Step 4 – Implement Mitigation Strategies Based on Data
Using the data collected, develop a targeted mitigation plan. If the primary room shows consistently high dander levels, increase the frequency of vacuuming with a HEPA‑equipped vacuum cleaner and wash pet bedding weekly. For rooms with poor ventilation, install a window fan or adjust the HVAC system to increase fresh‑air intake, as indicated by the Aranet4’s CO2 readings.
Consider using the Temtemp M10+ on a weekly basis to monitor the long‑term impact of these changes. Set the device to log data automatically and review trends over a month. A steady decline in PM2.5 values will confirm that the mitigation measures are effective.
Document each change in the notebook, noting the date, action taken, and subsequent air‑quality readings. This systematic approach enables continuous improvement and provides evidence for any future adjustments.
Tips & Pro Tips
- Schedule the test during a typical day when the pet is active; this ensures that the data reflects normal dander production.
- Place the monitors away from direct sunlight or heat sources to avoid sensor drift.
- Use the Temtemp M10+ app’s OTA update feature to keep the firmware current, guaranteeing accurate sensor performance.
- When using the Levoit Vital 100S-P, enable the Sleep Mode at night; the device reduces fan noise to 25 dB while maintaining HEPA‑grade filtration.
- For households with multiple pets, repeat the sampling process after each pet’s grooming session to capture peak dander emissions.
Troubleshooting
Problem: PM2.5 readings remain unusually low despite visible dander on tapes.
Solution: Verify that the Temtemp M10+ sensor is not obstructed by dust or fingerprints. Clean the sensor window with a soft, lint‑free cloth and recalibrate the device.
Problem: CO2 readings do not change after adjusting ventilation.
Solution: Ensure that the Aranet4 Home battery is fully charged; a low battery can cause inaccurate measurements. Replace the battery if the device indicates a voltage drop.
Conclusion
By following this comprehensive guide, one can reliably detect, capture, and measure pet dander within a home environment. The combination of real‑time monitoring devices, passive capture methods, and data‑driven mitigation strategies empowers pet owners to create healthier indoor air for both humans and animals. Regular monitoring with the recommended tools will sustain low dander levels and improve overall comfort.
Products Mentioned in This Guide
Frequently Asked Questions
What equipment do I need to create a DIY home test for pet dander?
You need a portable air‑quality monitor that measures PM2.5 (e.g., Temtop M10+), a multi‑parameter CO2/volatile organic compound monitor, adhesive sampling pads, and basic household tools like a ruler and timer.
How does a portable air‑quality monitor detect pet dander?
The monitor samples airborne particles and reports PM2.5 levels; pet dander particles fall within this size range, allowing the device to estimate their concentration.
Can I measure dander levels in individual rooms?
Yes, place the monitor in each room for a consistent period (e.g., 10‑15 minutes) and record the PM2.5 readings to compare concentrations across spaces.
How frequently should I run the DIY dander test?
Perform the test monthly or after major cleaning events to track trends and evaluate the effectiveness of mitigation measures.
What actions can reduce high pet dander readings identified by the test?
Increase ventilation, use HEPA air purifiers, bathe and groom pets regularly, and clean fabrics and upholstery with a vacuum equipped with a HEPA filter.